Showing posts with label fabric stash. Show all posts

Tuesday, January 15, 2013

Twin Kittens Scrap Project


I have been having an enjoyable time organizing and planning my projects for the new year!  In my sorting and arranging,  I came across a little Xeroxed pattern from my Mom's files, which I think she must have used for a bazaar project years ago--so I decided to try it out in her honor, and in honor of Baby K's second birthday this month.  And since I am doing the sewing, of course it had to be a scrap project!


I cut bodies for two little kittens from the pattern, using some 'tea dyed' muslin from my stash, and sewed all the way around each with a 1/8" seam.  After clipping all the curves and angles, I made a slash (about 1-1/2") vertically in their backs, turned and pressed them, and stitched across the base of the ears to keep them flat.  

I stuffed the kitties and sutured up their incisions.  Let me just say one more time how much I LOVE Morning Glory 'Cluster Stuff' craft stuffing!  The fibers are curly and springy, and fill stuffed spaces lightly and evenly with no effort at all!  I got mine at Walmart.  It's a must!

Even though there is no talent for painting in these hands of mine, but I did bravely paint on their little faces with acrylic paint according to the pattern, and made little whiskers with a super-fine Sharpie--this is far outside my comfort zone!

The fabrics for the kitties' tiny dresses also came into my fabric stash from my Mom's fabric stash, as well as the eyelet for their collars.  I hemmed the fabric rectangles, slashed the armholes and treated them with Fraycheck, and turned and hand gathered the top edges around the kittens' necks.  A stitched-on little bow finishes them off.

I'm afraid they look cold--maybe a little blanket. . .

Monday, October 1, 2012

Miniatures Monday--Tiny Dresses


Even though I am (and my children are!) past school age, autumn still brings on that familiar urge to buy new notebooks and pencils, and to make new school clothes-- looks like the tiny dolls are in luck!

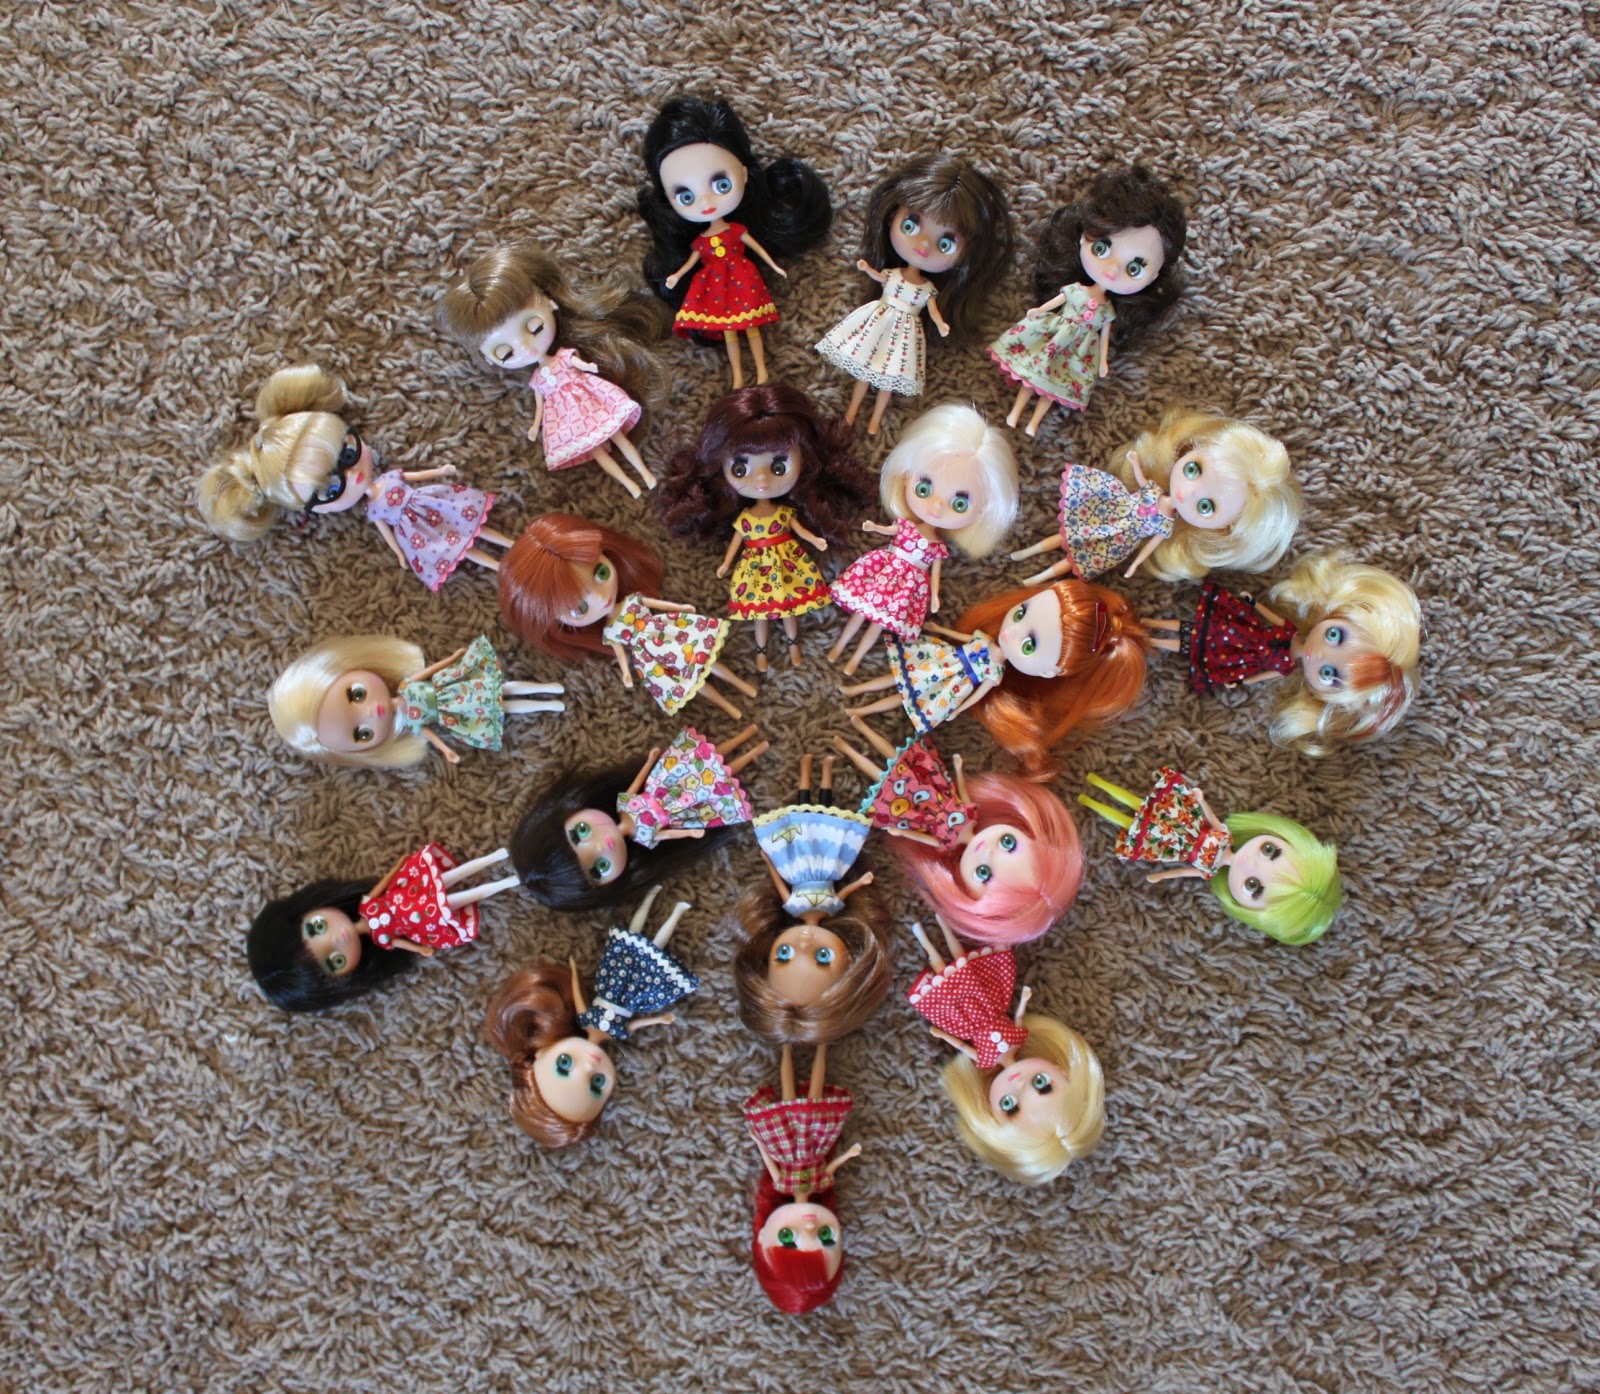
There's a new dress for each of the Tiny Ones--except a couple of girls who are currently at the spa.  So much fun choosing the tiny scraps of fabric and trim!

Monday, September 17, 2012

Miniatures Monday--Little Red Dresses

Fiona, Marguerite, Antonia, Margery, and their new (and as yet nameless) friend are pleased to model their finished red dresses.

The little dresses close in the back with Velcro.  It's been fun perfecting the pattern--and making an entire dress from scraps of fabric and trim makes me very happy!  Their tiny buttons are from a lot which Care and I bought on line.  Many more little frocks are in various stages of completion!

Monday, September 10, 2012

Miniatures Monday--Tiny Bodices


Working on the bodices of a series of red dresses for the tiny girls--
sooo fuuun!

Part of the delight of this project:  making an entire dress from a little scrap of fabric.  And another part:  adding the little scraps of trims!

Finished dresses soon!

Thursday, February 16, 2012

Baby K's Quilt--One Last Time


It's almost too embarrassing to admit that I have finally finished my baby gift for Baby K, our youngest grandbaby--almost in time for her first birthday. (This sad photo is nearly as embarrassing.) But I post it anyway.

I almost added another border, but the quilt turned out to be about 44" by 44"--she will fit under it for a while still! Lol helped choose this border, which I think sets off the blocks very nicely. And I can stop feeling guilty.


Thursday, January 26, 2012

Thrift Thursday--Pink Sewing Box


Love at first sight! This time-travel pink sewing box was on the thrift store shelf for$1.50, and went straight into my shopping basket.


The wicker box measures 11" across and 7" high, and is in amazing condition. The masonite lid opens over to the side on the cord handles. From the decal and the color, I figure it must date from the early 50's.


I'm keeping the box by my chair in the living room, set up with all I need to tempt me to work on my on-going Christmas blanket embroidery project.

You can just see the panel of organizing pockets I made from a matching vintage print fabric, glued to the font inside. I've had this ancient Sucrets tin in my craft stuff since I was a child--now it holds a book of needles and some knitting markers. A couple of the thread holders are missing, so I used one of the holes to anchor my embroidery scissors with a ribbon.

On with the project!

Sunday, January 15, 2012

Miniatures Monday--Ballet Class


Who could resist anything so cute and tiny? I have become enchanted with Littlest Pet Shop Blythe dolls! So far, twelve and counting. . .

L.P.S. Blythes are found in the toy aisle, and come with an outfit, a pet, and a pet accessory--I have to say that the Pet Shop pets do not speak to me, but they are very special to other girls in the family, so everyone is happy! The girls are 4.5 inches high, and also come with the cutest tiny shoes, and a stand.

Here, just a few of the girls are modeling the leotard-and-tutu sets I made for their ballet class, using bits and scraps from my stash. Working out the pattern was a fun challenge!

Too much fun!

Wednesday, December 21, 2011

Kids Sleep Masks


Link
Deep into my annual pajamas-robes-slippers project for my grandkids, I have come up with a new variation this year--sleep masks!

I actually had all but two of these fleece colors in my stash, so it's almost a scrap project. I developed the patterns from a basic sleep mask pattern, with inspiration from Google Images. All credit to real artists!

Check out Care's clever, fast, and easy technique for working layered patterns in fleece--it's fun and works up fast! I worked the designs on a single layer of the basic fabric, then top-stitched the fronts to a second layer, sandwiching in the ends of the elastic at the sides--two rows of elastic help keep the mask on. The outside shape is cut out after the edges are stitched--much easier!

Merry Christmas!


Wednesday, August 31, 2011

A Quilt for Baby K--Suggestions?


I'm working with my collection of reproduction vintage fabrics to make a special Grandma quilt for our newest little granddaughter.

Repro vintage prints make me happy--they remind me so much of the treasured quilts, made by my own grandmas, that were in our house when I was a child. A couple of which are mine today!

I've spent some enjoyable time hovering over my stash, and came up with a pleasing group of colors and pieces. So far, I've made 13 random 9-patch squares, then chose 12 of the same pieces and made the alternating applique' hearts.

I always seek the advice of my expert quilt block arranger (daughter Lol) when laying out a quilt, but in this case it doesn't seem to matter too much how the blocks are arranged, the colors and pieces are so random!

So, I have the blocks dealt out on my dollar store design wall, ready to be stitched together. At that point, the quilt will measure 28 inches by 28 inches.

So. . .what next? It definitely needs to be larger, so I'm thinking borders. Pieced? Narrow? Print? Multiple? If so, how many? I'll audition a few ideas with my stash fabrics and think.

Any ideas?


Link


Monday, April 11, 2011

Spiral Flowers, Part 2!


Further rumination on spiral flowers. . .

I decided to try making a flower with some blue vintage bias tape from my stash, pressed open and stitched along the middle. This flower is my favorite! I love the ruffly raw edges.

Here is a version made from torn strips of some pink silk organza--this one is my least favorite try, but it might be better in a color that contrasts more. I do love the torn edges, though.

Still contemplating a tutorial. . .
Monday, March 21, 2011

Renaissance Head Gear--for Pennies!


Renaissance headgear is needed for the annual conference of our church women's group, and I've been having big fun coming up with easy and inexpensive ideas--from the dollar store and thrift store, of course!


Now, I'm not claiming that any of these ideas are particularly authentic, though I did do my research--but what can you expect for 25 to 50 cents each? And after the big day they can all go straight into the costume box.

The first hat above is a ring, cut and stapled into a circle, from a roll of wired velvet ribbon I found at the thrift store for a dollar. The veil is made from a golden thrift store sheet--the sheet cost $2.00 and made a pile of veils when cut into squares. It was polyester, so I was able to avoid hemming the edges by fusing them--just pass the cut edge near a candle flame. Keep it moving to avoid potential problems! I gathered one edge of the veil and stitched it to the ribbon, but it could be stapled on just as well, and the veil could be attached at the back.

Hat #2 above is a scrap project--the brim is a scrap left over from a project involving a different gold thrift store sheet. I folded a long strip of fabric lengthwise, and stitched along the raw edges, making a 2-3/4" casing, then threaded through a piece of 2-1/2" elastic, 22" long. I sewed this strip into a circle, then cut a big circle (about 24" in diameter) from some scrap velour left over from a robe project. The circle is gathered around the edges, then seamed to the brim section right sides together. Voila!

Hat #3 was inspired by the glittery party hats shown above. I used the party hat cardboard to make a pattern and cut a base from poster board. The poster board base is covered with some brocade I had in my stash, front and back, and stapled to the metal band from the party hat. This veil is one of a pile I cut from a thrift store curtain panel, price $1.00. The edges of these veils are fused in the same manner as above.

Hat #4 is easiest of all, and pretty much a freebie. Plastic swamp cooler tubing is cut to length and joined into a circle--I used short pieces of sucker sticks, inserted in both ends, to join the tubes--somehow the sucker sticks were just the right diameter. The circle is covered with scrap ribbon, wound around and hot-glued on, and lengths of ribbon from my stash trail from the back. Curly ribbon would work just as well here.

Now for a step back in time. . .

Friday, February 25, 2011

Wool Owlets!


I've been amassing a collection of wool fabric, both new and used, for years now--so when Linds showed me these charming little owls on line, I knew I had to make them for her birthday.

If you visit the above site, you will find an excellent tutowlrial for making these guys--the little ones, whoo are about 2-1/2" high, are made according to the pattern. I enlarged the pattern to make the parents, whoo are about 5" high. Note the squidgy-looking one--I thought I would try him as a little rice hand-warmer to heat in the microwave.

The grandkids had big fun helping me go through the button box to choose and place the eyes--I love their expressions!

Happy birthday to Linds!


Tuesday, February 8, 2011

Uphostery Sample Heart--a Question!


My husband and daughter Lol once came home from a yard-sale outing with a gift for me--a BIG box, full of good-sized upholstery samples! I'm still having fun pulling them out occasionally for use in my scrap projects.

Last Valentine's day I saw a fun heart-shaped fabric door decoration--a slightly irregular-shaped, lightly padded heart. This year I decided to make my own version from scraps, so I pulled out my box of samples.

I love this floral--very romantic! I sketched a heart on a scrap of dollar-store foam core (mine is about 16" tall by 14" wide), and cut it out, then cut a couple of layers of scrap quilt batting in the same shape, plus one somewhat smaller to go underneath and make it more puffy. I cut out the heart shape from my fabric and added 1" all around to allow me to glue it to the back of the foam core.

I made 1/2" snips all around the fabric piece , about 1" apart, to help the back to lie smooth, layered it all together, and glued the edges of the fabric to the back of the foam core with my glue gun, then I hot-glued the whole thing to a heart cut from mat board to make it more sturdy and add dimension.

And now I'm a little stuck--it certainly needs some embellishment. I'm thinking fat cording around the edges? Green? A sheer bow at the center top? Tufting. . .?

Monday, November 1, 2010

Blogger's Quilt Festival!


It's Amy fourth Blogger's Quilt Festival over at Amy's Creative Side--I do believe I will join in the fun!

My Stack-and-Whack Star quilt, which I now love, had its beginnings (at least in my mind) as my Unfinished Quilt of Horror, or as Care dubbed it, the Vomit Quilt.

It truly began with the best of intentions, and then went swiftly awry. I had done a few stack-and-whack projects, and happily contemplated a stack-and-whack star quilt. I chose a pile of fabric pieces from my stash (how I do love a scrap project!) then stacked, whacked, shuffled, and began to sew my way through the pile. I was excited to see the random combination of fabrics in the blocks, but then some of them turned out seriously less than cute, and almost disturbing. Queasy, I quickly put it all away.


Over the next couple of years, I would take it out and wonder where I had gone wrong, then put it back in horror. At last, Care helped my put my finger on the problem--the fabric she ruthlessly called the 'vomit print', which had contaminated everything it had touched--and I am sure you can tell which it is. (Warning--you may want to shield your eyes at this point!)

With the worst of the blocks firmly eliminated, I was able to make progress--you could read more about the process here--and finished with a cute, girlie birthday quilt, now beloved by my grand-daughter Joy-joy. Here's a view of the back:


Since I was determined to make this a scrap project, I scrounged up the backing from scraps and my available yellow fabrics, and pieced the batting from scraps. I even had the perfect stripe for the binding! It was a fun learning process--triumph at last!


Monday, September 20, 2010

Vinyl Revival Project #6--Sleepover Backpack!


Felicity's sleepover gear is now complete, with her matching pajama pants and her new recycled backpack to hold Project #5 (her sleeping bag and pillow)--and I think I may be about finished for now with vinyl recycle projects! A few more ideas for later, though. . .

This little backpack measures 7" by 3". I started by cutting a rectangle of vinyl, 9-1/2" tall by 12-1/2 around, and a vinyl circle 4-1/2" in diameter for the set-in bottom. (I had hoped to make a tutorial--it turns out clear materials don't really lend themselves to photography!)

The straps are scraps of black ribbon stitched down the center of wider scraps of pink ribbon, then rolled up in 1-1/2 inch strips of vinyl and stitched again. I stitched the straps to the flat main piece before sewing it into a tube, and then set in the bottom circle. The top of the backpack is finished with a 5/8" casing, and more scrap pink ribbon is threaded through the casing for the tie. (I've used 1/4" seam allowances here.)

And how about a very odd coincidence: head over and check out Care's Dollar Dolly Duffel Bag post for today. As we were describing our projects to each other over the phone yesterday, we realized that, strangely enough, my sleeping bag would just fit in her duffel bag! Who knew? It must be a sign. Of what, it's hard to say!

On to other, non-vinyl projects, I think!

Friday, September 17, 2010

Vinyl Revival Challenge--Project #5: the Zipper!


I've been happily anticipating and working on the recycle project for the lovely, long 58" zipper from my Challenge Item-- andso here is my Recycle Felicity doll's

Slumber Party Sleeping Bag!


Felicity is almost (but not quite!) ready for a fun night with friends. I was inspired by Care's fun toy sleeping bag tutorial to make a bigger version that fits an 18" doll--I followed her excellent instructions exactly, but used 13" by 19" pieces for the outer fabric and lining. The finished bag measures 12" by 18", and takes a zipper at least 28" long.

As much as I hate to buy anything new for a recycle project, in this case I just didn't have any fabric that seemed to work, so I bought (gasp!) 3/4 yard of pink leopard fabric and spent $3.74. Sigh. For the lining, a used a piece of soft white polar fleece that I had on hand, so no batting was needed.

Of course Felicity needs a matching pillow case, and there was plenty of fabric to make one, set off with a black rick-rack insert from my ribbon-and-trim stash. Her pillow is 5" by 7", and Felicity is wearing her pj's from my doll-clothes-from-undies project here.

Next, the rest of Felicity's slumber party preparations--more Vinyl Revival!


Wednesday, September 8, 2010

Vinyl Revival Challenge--Project #2!


Project #2 from my vinyl recycle challenge: a cute baby bib that wipes clean!

The bib, measuring 9" x 9"", is made with two layers of my recycled vinyl, with cute little plastic baby-themed trinkets between the layers. (The trinkets are recycled from a baby shower, of course!)

I traced an existing bib for the pattern, and cut the two layers of vinyl at the same time--judicious pinning was required here, but holes don't seem to show too much. I stitched around the outer edges to secure the layers, then bound them with bias tape--I actually used my Clover bias tape maker to make the tape from scraps of pink dotted fabric, but commercial bias would certainly do the job. After dropping the plastic trinkets inside, I use the same bias to bind the neckline and make the ties. The bow is from my mom's ribbon-and-trim stash.

So . . . it's pretty cute, right? Let me just say, however, that I realize this is not an especially practical concept. A wipe-off bib would seem to be an excellent idea, but bibs get messy, and the binding would definitely need to be washed. Water would certainly get inside the vinyl layers and never dry. I suppose that an absorbent bib is a better overall plan anyway as far as capturing a mess--how about a layer of fabric with one of vinyl? Ideas?

Not to mention the fact that leaning against the trinkets might be pretty uncomfortable for the baby!

I suppose I just couldn't resist carrying the project out as an exercise!

Tuesday, August 24, 2010

Little Quilt for Panda, Part 3


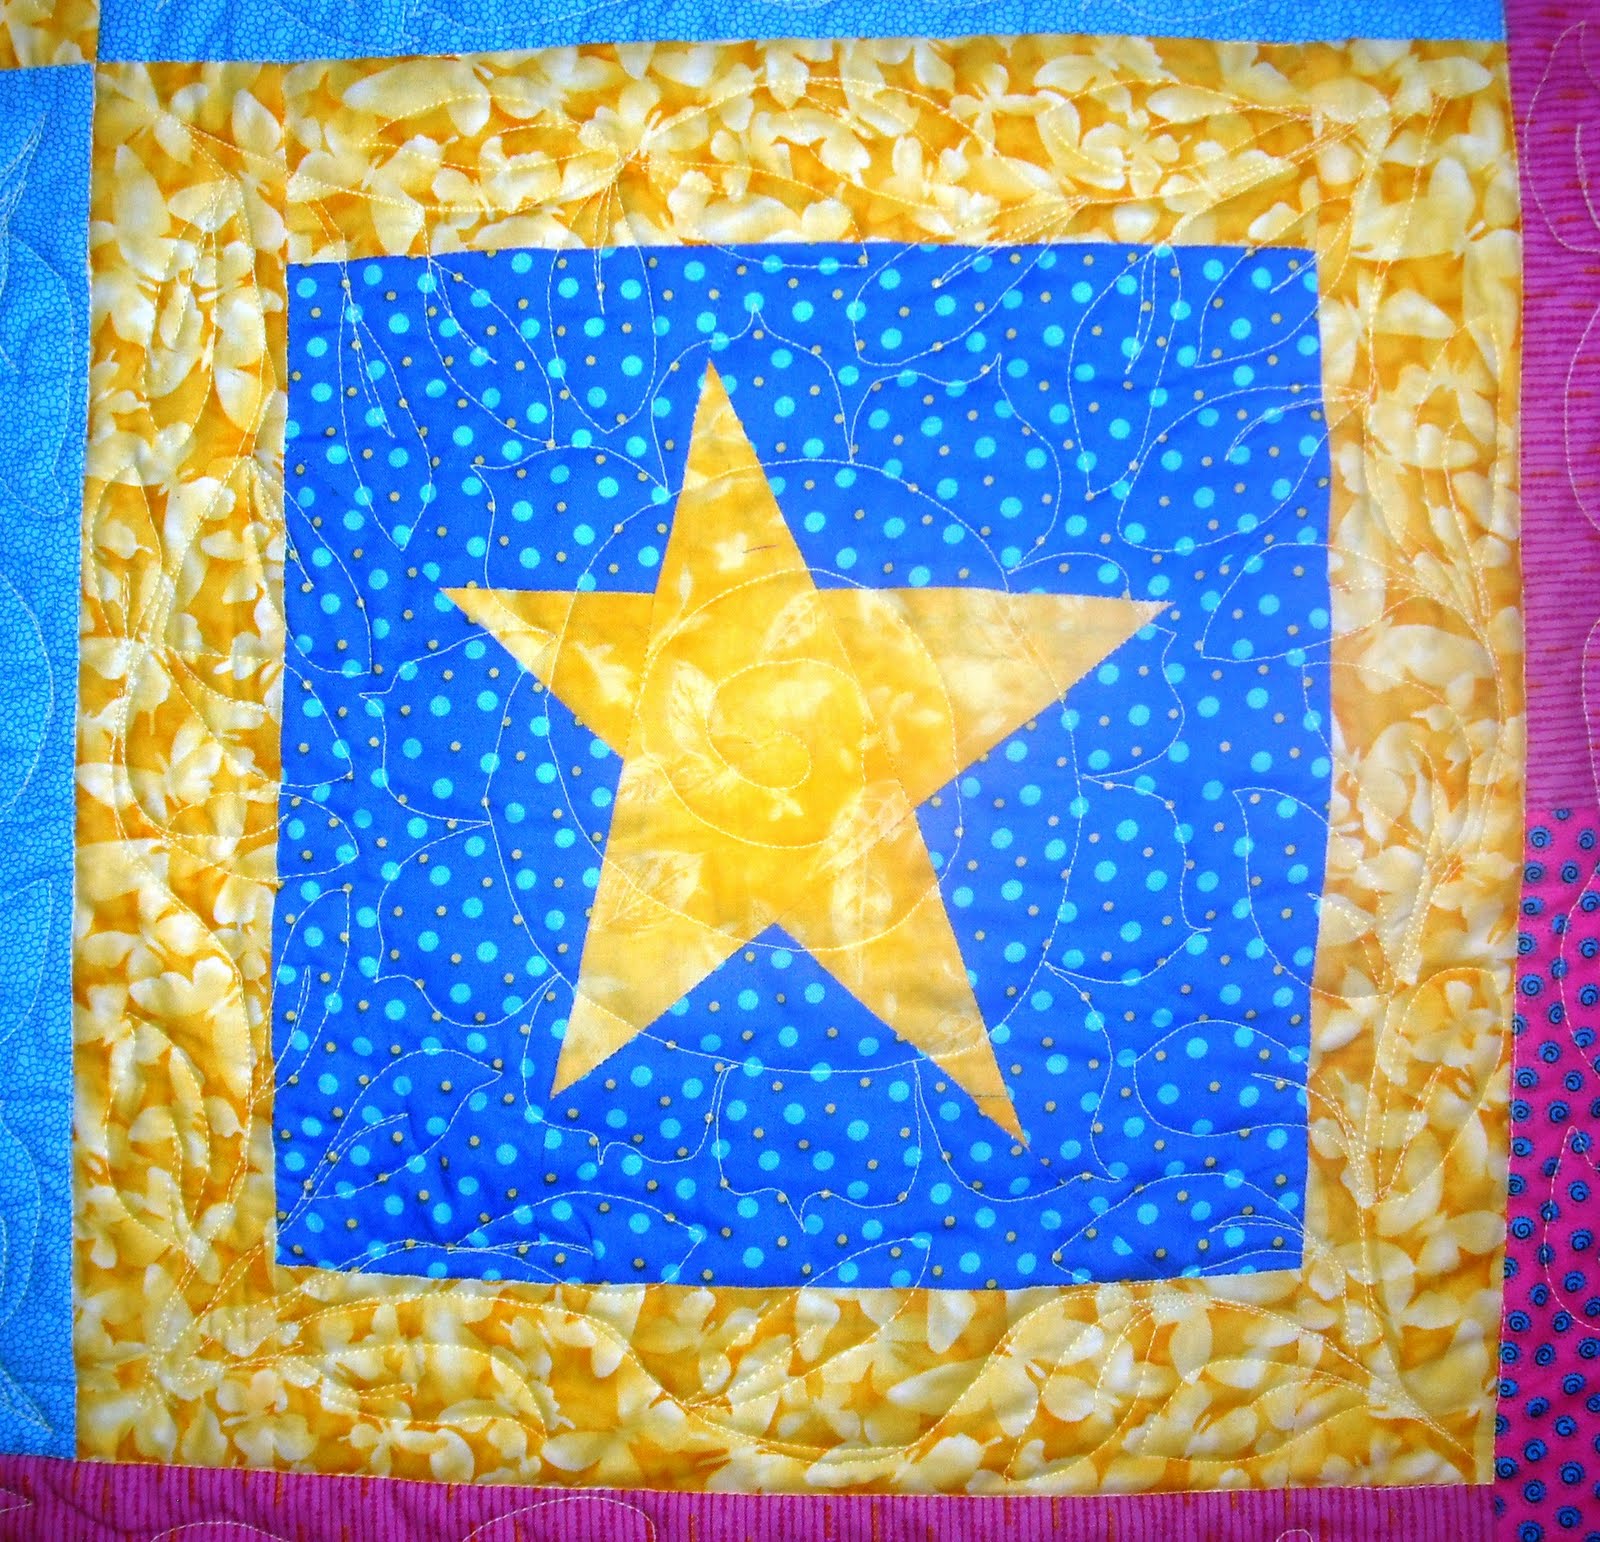
Joy-joy's special panda's quilt is at last finished and ready to be dropped off tomorrow, and I must say it matches Joy-joy's new quilt quite nicely!


Our design dilemma was solved quite neatly by exchanging the borders of the two lower blocks. I was concerned about the stars and borders in those two blocks matching too closely, but I think it works well, after all.

The outer borders and binding match those on the bigger quilt, and the quilting matches, too. The little quilt turned out to be 20" by 20"--and let me just say it is more square than the photo would seem to show!

All in all, quite a satisfying scrap project. Hope the colors don't keep them up all night.


Sunday, August 8, 2010

Quilt for Panda, Part 2


Still working on the re-arrangement of Panda's quilt squares.

Joy-joy says she 'needs' the pink fabrics to be diagonal from each other, and I completely agree. The balance is just off, and if we trade the two bottom blocks we will have the yellow and the blue frames side by side. Probably the best plan is to pick off the frames of the two bottom blocks and switch them. Sadly, this will put a blue frame on the blue star and a yellow frame on the yellow star. We'll see what happens.

I wonder if I am going into over-tweak on this!

Tuesday, July 27, 2010

Quilt of Horror, Part 6--Horrible No More!


With a great surge of relief, I have met the challenge--my misguided stack-and-whack project is redeemed, and passed along to a happy new owner! I have to say all horror has been eliminated--it's charming! Many thanks to all who participated in its transformation.


The back was fun to work out--I decided on yellow, and since this is a scrap project, I searched my stash, but was disgruntled to find that my existing piece was not long enough. I was forced to buy another piece of yellow, and set the two checkerboard style to echo the front a bit, with a strip of scrap rectangles to add some color and focus.

The back and front are layered with batting pieced together from extra pieces of Warm and Natural--I loosely zigzagged the edges of the off-cuts together. It seemed the quilting should be curved and organic to contrast with the angular design of the top, so I quilted giant sunflowers in the center of each block, surrounded by leafy vines. The outer border is also quilted in a vine pattern.

The binding makes me very happy! I found a striped piece in my stash in just the colors needed--you have to love a striped binding.


Joy-joy is the happy new owner, and requests a small matching quilt for her beloved stuffed panda--I hope to find my scraps and just by-pass the horror phase.