Thursday, December 1, 2016

Dollar Doll Clothes--One More Time!


Two more dolly projects from undies--my favorites so far!

There was juuuust enough fabric in the pink print pair from my K-Mart find to squeeze out a PJ t-top as well as the pants.  I used my 'Leggings' pattern here.  So comfy!


And camo pants!  Care found a three-pack of boys briefs on clearance for source fabric, and this particular print proved too large to use for the smaller dolls. Perfect for 
Felicity, though!

Love this t-shirt pattern, which closes in the back with Velcro.  Read about it here. 

My Dollar Doll Clothes inspiration seems fulfilled for now, and this little wardrobe is off to the church service auction tonight to find a happy new home for Christmas.

Still have a bit of source fabric for next time, though...


Saturday, November 26, 2016

Dollar Doll Clothes--Again!


My yard sale American Girl, Felicity, is modelling yet another Dollar Doll Clothes outfit.

I used my $.80 ladies undies and the 'Leggings' pattern and instructions from my free download to make her leggings, and my favorite Liberty Jane 'Trendy T-shirt' pattern for her top.

Not sure about her skirt, though!  I was thinking of making a cute flared lettuce hem, so I cut it from the dolly 'undies' pattern, then stretched the hem as much as possible as I zig-zagged over the cut edge, stretching and stitching twice around.  Stitching the back seam was last.

I'm thinking an added ruffle would just have been cuter.  Any ideas?


Saturday, November 19, 2016

More Dollar Doll Clothes!


Playing with my Dollar Doll Clothes patterns inspired me, so last week I went on a quest for new dollar undies to work with.  At K-mart I hit the jackpot--2 packages of 6 briefs each, some in cute prints (AND x-large size) on clearance for $4.99 each!  That's $.83 a pair.


I am delighted to think that I can make two or even three items from each pair!  And I paid for the whole project with my (about to expire) $10.00 in-store points, making my dolly wardrobe virtually free. You can check this post for general instructions for the project..

 Felicity's long striped skirt above is cut from the center of the undies' back panel.  I used the 'leggings' pattern for the waist size, and cut the center back seam to flare as wide as the fabric allowed.  My finished length is 9.5", so I cut the skirt 10" long to allow for a 1/2" hem.  I hemmed the piece, then stitched the back seam last.


I used the 'leggings' pattern to make the cute black ones above, and used the 'socks' pattern with leftover bits from the black fabric's waistline to keep her feet warm.

Let me tell you about the two t-shirts--I used my favorite 'Trendy T-shirt' pattern, downloaded from Liberty Jane, and fabric from the undies.The pattern is fun and simple to make. I got my copy from their free Friday downloads.  Check them out!

A tip--these particular briefs have attractive covered elastic bands:  cute on the doll clothes, but a little less stretchy than the classic elastic finish.  I compensated by cutting the pattern pieces slightly narrower at the waist.


Thursday, February 14, 2013

Valentine's Day Greetings!


A happy Valentine's Day to all!


 Tiny quilt and A-line dresses by Care, sweaters by Suedehead, yoked dresses by me.

Monday, February 11, 2013

Miniautres Monday--Little Table at Last!


It looks like there has been a small furniture convergence!

 As it often goes with the Yard Sale Gods:  just as I mentioned my longing for a little table for the play area, daughter Ib found this delightful little chair and table set at her local thrift store--just perfect for small people!

I'm happy to say that the little chairs from my previous find also fit perfectly at the table--seating for four. 

To the Yard Sale Gods:  many thanks!  And please be advised that all available space for little furniture is now full!

Monday, February 4, 2013

Miniatures Monday--the Little Rocking Chair


My mom and I shared a love for small things--and we also shared a love for this little chair from her childhood!

This little rocker (shown here with the little cabinet my dad made for me when I was five) was always around as I grew up. 

I learned later that my grandfather had it made for Mom when she was a little girl, in about 1930, by a local carpenter who used the wood from shipping crates and containers to make useful objects. I love its apparent Arts and Crafts roots!  Mom also pieced its current seat cover--the chair has had a few coats of paint as well as layers of upholstery!

The little chair is still sturdy and strong, and is being enjoyed by my own grandchildren. 

Monday, January 28, 2013

Miniatures Monday--the Little Mohair Girls


   An e-friend gave Care and me some mohair scraps, so naturally some of the Tiny Ones made a trip to the beauty salon for new coiffures!
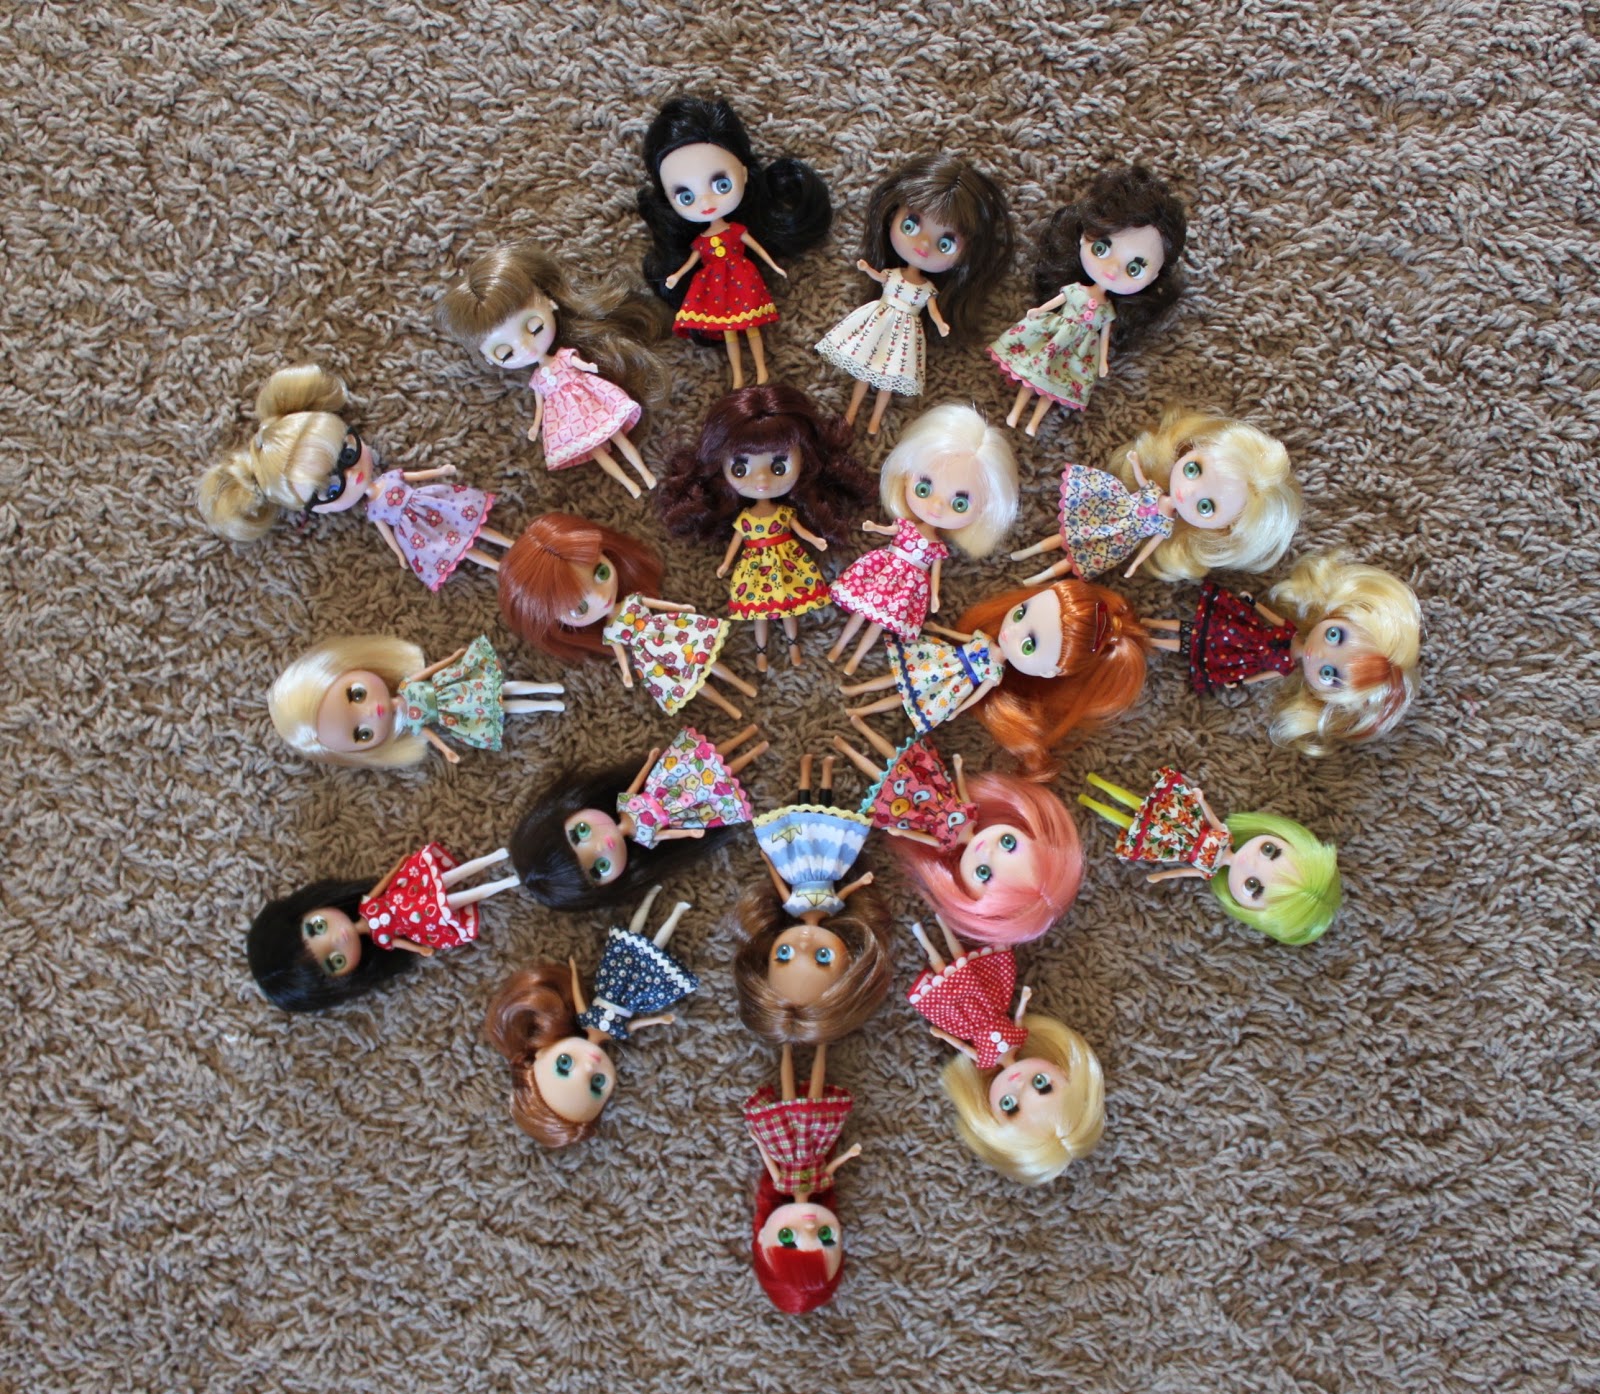
Please meet  Antoinette, Blush, Dorothy,  Mallow,  Molly,  Octavia, Storm, Taylor, Tippin, Topenga, Vivian, and Zara, (who is a fabulous custom reroot by Leeloominai and joined the girls at the party).
It's been fun working out a technique for new little wigs--I have to admit that the hardest part has been cutting off their hair and pulling out its roots!  It seems too cruel. But it WAS fun trying all the little wigs on the bald girls to see whose hair they were.

Wardrobe consultation, photos, and clothes are by Care, and Storm and Zara's amazing custom tans and sweater by by Suedehead.


Saturday, January 19, 2013

A Bed for the Twin Kittens


My Twin Kittens projects has morphed and expanded--the little kitties seemed to need a cozy place to nap!

Since this is still a scrap project, I poked around the house to find a base to work with and came up with a square plastic ice cream bucket.  I cut it off 2-2/14 inches from the bottom with my Xacto blade, and had my frame.


This cute floral stripe print came from my Mom's stash and goes well with the kitties' dresses--the fabric for the sheet and pillowcase is a fat quarter that was left over from a bundle.  I measured the top of the base and cut a strip of fabric that length (plus seam allowance), wide enough to extend down inside the base.


I cut the ruffle about 1-1/2 times the length of the first strip, and  2-1/4 wide after hemming--the same measurement as the height of the base, so it will just cover the outside--then ruffled it onto the shorter strip and sewed the two ends together, making a circle.  The seam allowance of the ruffle is hot-glued to the upper outside edge of the base, then the flat strip is hot-glued down the inside.


I cut three layers of leftover glazed quilt batting the size of the base to make the mattress, and covered them with my fat quarter fabric.  I did cover the entire thing like a cushion, but it occurs to me the fabric could just be hot-glued around the mattress, since it's glued in place anyway! 


 The little pillow is made of some more of my leftover glazed batting, folded and hand stitched into a pillow shape, and the pillowcase sized to fit.

 It became obvious that the bed needed a handle so that Baby K can carry it around, so I covered a strip of thrift-store plastic canvas from my stash with the last length of floral stripes and then poked a hole in each end with my awl, making corresponding holes in the sides of the bed..  (A little FrayCheck takes care of any raveling.)  There is  a button on the inside and outside at each side of the bed, stitched together through the hole so that the handle can rotate.

The twin kittens look warm and cozy in their new bed!
.

Thursday, January 17, 2013

Thrift Thursday--Little Wooden Chairs for the Grandkids


 A thrift store outing with Hubby last weekend yielded these three sturdy pine children's chairs, at $9.00 for the set-- they look as if they were hand made, and I love the simple style and wood finish.

Now I just need a little table for the play area downstairs. . .

Tuesday, January 15, 2013

Twin Kittens Scrap Project


I have been having an enjoyable time organizing and planning my projects for the new year!  In my sorting and arranging,  I came across a little Xeroxed pattern from my Mom's files, which I think she must have used for a bazaar project years ago--so I decided to try it out in her honor, and in honor of Baby K's second birthday this month.  And since I am doing the sewing, of course it had to be a scrap project!


I cut bodies for two little kittens from the pattern, using some 'tea dyed' muslin from my stash, and sewed all the way around each with a 1/8" seam.  After clipping all the curves and angles, I made a slash (about 1-1/2") vertically in their backs, turned and pressed them, and stitched across the base of the ears to keep them flat.  

I stuffed the kitties and sutured up their incisions.  Let me just say one more time how much I LOVE Morning Glory 'Cluster Stuff' craft stuffing!  The fibers are curly and springy, and fill stuffed spaces lightly and evenly with no effort at all!  I got mine at Walmart.  It's a must!

Even though there is no talent for painting in these hands of mine, but I did bravely paint on their little faces with acrylic paint according to the pattern, and made little whiskers with a super-fine Sharpie--this is far outside my comfort zone!

The fabrics for the kitties' tiny dresses also came into my fabric stash from my Mom's fabric stash, as well as the eyelet for their collars.  I hemmed the fabric rectangles, slashed the armholes and treated them with Fraycheck, and turned and hand gathered the top edges around the kittens' necks.  A stitched-on little bow finishes them off.

I'm afraid they look cold--maybe a little blanket. . .

Wednesday, January 9, 2013

Before and After--Miss D.'s Dress


Three-year-old Miss D.'s Christmas dress needed a bit of additional length, since she does not care to wear tights or leggings--so her mom and I decided to solve the problem by adding three inches of black tulle netting to the dress's underskirt.

This little dress already has a ruffle of red netting attached to its red taffeta underskirt, so we also stitched the new black tulle ruffle to the underskirt, with the top edge of the black tulle covered by the red tulle.. (In my opinion, such stiff ruffles should always be attached on the TOP of the lining or underskirt to prevent scratchiness against the skin!)!


In this case, the new ruffle is 6" wide.  It's stitched to the lining 3" from the edge, so that 3" extends from under the skirt itself.

I cut the ruffle 3-1/2 times the width of the skirt hem, and 12 " wide.  After seaming the ruffle panels together in a huge circle, I folded it lengthwise and gathered it along the folded edge.


Here's a great way to gather a long ruffle:  Fold the piece to be ruffled in fourths along the width, and mark the quarters with pins.  To ruffle, place a piece of sturdy cord (I used crochet thread) along the line to be ruffled and zig-zag over the cord with a medium stitch width and length.  It's then easy to pull up and adjust the ruffle, with little danger of breakage.  Mark the edge which the ruffle will be attached to in quarters, match the pins, adjust the fullness, and stitch. 

The cord could show a bit, so I stitched the ruffle to the underskirt with a narrow zig-zag, next to the gathering cord, then pulled out the cord.

I have to say I think the ruffle really adds to the dress--and Miss D. loves the added twirly factor!


Monday, October 1, 2012

Miniatures Monday--Tiny Dresses


Even though I am (and my children are!) past school age, autumn still brings on that familiar urge to buy new notebooks and pencils, and to make new school clothes-- looks like the tiny dolls are in luck!

There's a new dress for each of the Tiny Ones--except a couple of girls who are currently at the spa.  So much fun choosing the tiny scraps of fabric and trim!

Monday, September 17, 2012

Miniatures Monday--Little Red Dresses

Fiona, Marguerite, Antonia, Margery, and their new (and as yet nameless) friend are pleased to model their finished red dresses.

The little dresses close in the back with Velcro.  It's been fun perfecting the pattern--and making an entire dress from scraps of fabric and trim makes me very happy!  Their tiny buttons are from a lot which Care and I bought on line.  Many more little frocks are in various stages of completion!

Thursday, September 13, 2012

Thrift Thursday--Little BBQ Grill


$6.00--something of a splurge for the thrift store, but a perfect addition to my little cupboard and chairs from my childhood.  
 
Little Mr. P spotted it on a thrift store outing with his mom, and knew it was just what Grandma needed for the play space.  Thanks, buddy!  It came complete with a tiny wooden steak and a small metal BBQ tool.

The little all-metal red-orange grill is about 14" tall, and is made just like a full-size charcoal grill.  It has no marks at all--it could be an actual table-top grill, I suppose.  I'm thinking it's from the 70's or 80's--any ideas?

Monday, September 10, 2012

Miniatures Monday--Tiny Bodices


Working on the bodices of a series of red dresses for the tiny girls--
sooo fuuun!

Part of the delight of this project:  making an entire dress from a little scrap of fabric.  And another part:  adding the little scraps of trims!

Finished dresses soon!

Monday, August 27, 2012

Miniatures Monday--Dollhouse Furniture, Part 6--the Bench


The tiny girls are proud to show off the results of their up-cycling efforts.  One last post post about my dollar store dollhouse furniture bash, and it's time to move on--now for The Bench.
 

My Dollar Tree dollhouse bed is pretty cute, I must admit--it's just too short for the dolls to rest comfortably. Time to bash!

I pulled off the bedspread, then popped off the head board and foot board, and cut the bed lengthwise into two pieces with my Xacto blade and a metal ruler--one piece (the new seat) is about 1-7/8" wide, the other (the new backrest) about 1-1/4" wide.


The foot board is cut into two equal pieces to make the sides and arms of the bench.  Save the headboard for another project!


Glue the seat and back together at an angle--hot glue works great for this.  Glue on the sides/arms.  With a little paint you're set!  Hmmm--looks like maybe a bit of sanding with an emery board could be a good plan!

It's been a long project, but the girls are almost ready to move into their new home at last.  

Friday, August 10, 2012

Dollar Store Dollhouse Furniture 5--The Dresser

The Dollar Store's little dollhouse dresser (or chest of drawers?--what do you say?)  is pretty cute as it is, but I'm unable to resist an update.  Plus, I still have that mirror, left over from my sofa table transformation . . . two pieces from one!

My little miter saw did a quick job of removing the dresser's bottom drawer, and a piece of molding left over from another dresser project finishes the raw lower edge.


A bit of wood from my craft scrapwood pile and some glue make a lid for the new low chest.


My leftover mirror is the perfect width for the top of the dresser--it's glued to a bit of the footboard of a bed!  (More on that later.)  A treatment with spray paint, and they're ready for my dollhouse shelf!


Wednesday, August 8, 2012

Dollar Store Dolllhouse Furniture 4--Dressing Table

 
The little Dollar Store dressing table is just too short to be in proportion--the chair just won't slide under.  (While the dolls may not care, it bothers me, so it must be fixed!)

 
Quick fix-- I popped off the skirt with my little pliers, and glued a bead to each of the legs to give them height (and style!).


Some paint, and it's all finished!

Monday, August 6, 2012

Miniatures Monday--Painting Project


Just a couple of pointers learned while painting my Dollar Store dollhouse furniture--it was a bit less straightforward than I had anticipated!

Spray paint seems to be the obvious solution for a quick paint job, so I got out the remnants of a can that was on hand:  less successful than I had hoped.  Since the furniture comes dyed and not painted, the grain of the wood hasn't been sealed, and the dye seeps through the paint:


Kind of pretty really, but not quite what I'm after.  Since I needed to replace my spray paint anyway, I picked up a can labelled 'Paint with Sealer'--and still had about the same results.

What to do?  Being reluctant to go out again,  I rifled through my disused nail polish and came up with a couple of mostly empty bottles of clear top coat. An hour outside in the shade coating the pink areas took care of the color bleeding, and another coat of spray paint did the job.  Here's the final version of two of the  narrow tables:


The little handles on this furniture are actually pegged into holes--easily pulled out and replaced with beads or jewels.  

(You can stick a piece of a Post-It note, cut to size, to the mirror before painting to keep it clean.) 

Next:  the dressing table.


Friday, August 3, 2012

Dollar Store Dollhouse Furniture 3--Sofa Table


Dollar Tree has a cute little dressing table--sadly, it is just too short to be in proportion. 
Two ideas to improve it:  first, a table to go behind the dolls' tiny sofa.

The apron and mirror sections popped off easily with my needlenose pliers--don't worry, they will be seen again!  (There was a little damage to the top surface of the veneer, but the remainder of that layer was easily popped off with my tiny screwdriver--nice and smooth and ready to paint.)

The legs are shortened just a bit to fit next to my little sofa.  Ready to paint!